Note: All this happened in mid-January. I've just been too busy to finish this and post until now...

Yupp. I built it! Here's how it happened...
Being a practical man, I want to build a quadrotor for a few concrete reasons:
- I want to write the flight controller from pretty much scratch, as an exercise in my control system knowledge.
- I want to show to the world just how easy and inexpensive it is to choose parts for, order, and build one of these.
- I want to to document my software design process in a way a blog reader can learn from.
- THEY'RE F****ING COOL. I mean, LOOK AT THESE:
AWWWW ^_^
Shane's 4PCB at MITERS.
Parts Selection:
I began the process by asking the experienced quadrotor-ers around MITERS and the IDC about where to start. Shane suggested I find a 330mm-size frame. Searching the Hobbyking Quadcopter frame section for "330" yielded the following beauty: http://www.hobbyking.com/hobbyking/store/__28172__F330_Glass_Fiber_Mini_Quadcopter_Frame_330mm.html. It seemed big enough to make the controller run smoothly while being small enough to comfortably fly indoors (my flying domain of choice, for now).
So I had a frame. To get from here to working quadrotor I need to spec out:
So I had a frame. To get from here to working quadrotor I need to spec out:
Frame- 4 x Brushless Motors
- 4 x Electronic Speed Controllers (ESCs for short, one per motor)
- n x sets of Propellers (Banks Hunter let me know these break often, so I ordered like 5 sets)
- Battery Pack
- Battery Charger (I did not purchase one because I already have one)
- Programmable microcontroller board (Arduino should do)
- IMU for angle feedback
- Other sensors for other kinds of feedback (usually come with the IMU and ucontroller board)
- XBee pair and USB interface, in order to give the quadrotor commands from my computer program.
Looking at the F330 frame's listing on the HobbyKing website gave me the proper specifications I needed for the various components. I chose the components necessary simply based on what was least expensive. I picked the SK3 Aerodrive 2826 motors with a Kv of 1130 rpm/V and many spare sets of red 8", 4.5"pitch propellers (These break often, I hear), which are within the specification range recommended by the F330 frame page. I chose 15-amp ESCs, which is more than I need for this size copter, because they were also well-priced. I then chose the lightest 1800mAh 3s (11.1 V nominal) battery I could find. In order to tie them all together with minimal wiring work, Banks suggested I use a nifty Power Distribution Board to get battery power to the ESCs.
As for the XBees, I chose to get this starter kit from Makershed, which was the least expensive option. It comes with a breadboard-able 5V-3.3V logic level shifter (Many electronics run on 5V, the XBees run on 3.3V) and a USB adapter so you can connect to a serial device (like a quadrotor!) wirelessly.
I'll worry about the sensors and microcontroller board later, because I have Arduinos and IMU breakout boards readily available nearby. The ESCs each take a 5V servo-style PWM input signal, so an Arduino is be able to command all 4 brushless motors. Apparently the ESCs also generate 5V for the logic power, so no need to use a regular!
Total cost? About $150.00. NOT BAD!
About a week after placing the order, I received the XBee starter kit from Makershed and the four SK3 2826 motors from the HobbyKing USA Warehouse in the mail. HobbyKing has both an International and USA warehouse, and you can isolate the online selection available from each right on the website. The International warehouse has a wider selection of products, but shipping to the USA is costly and takes forever. On the other hand, the USA HobbyKing warehouse does not have as wide a selection, but shipping to US destinations is both cheaper and more timely. For this build, I ordered everything but the motors from the International warehouse.
As for the XBees, I chose to get this starter kit from Makershed, which was the least expensive option. It comes with a breadboard-able 5V-3.3V logic level shifter (Many electronics run on 5V, the XBees run on 3.3V) and a USB adapter so you can connect to a serial device (like a quadrotor!) wirelessly.
I'll worry about the sensors and microcontroller board later, because I have Arduinos and IMU breakout boards readily available nearby. The ESCs each take a 5V servo-style PWM input signal, so an Arduino is be able to command all 4 brushless motors. Apparently the ESCs also generate 5V for the logic power, so no need to use a regular!
Total cost? About $150.00. NOT BAD!
Building the Quadrotor:
About a week after placing the order, I received the XBee starter kit from Makershed and the four SK3 2826 motors from the HobbyKing USA Warehouse in the mail. HobbyKing has both an International and USA warehouse, and you can isolate the online selection available from each right on the website. The International warehouse has a wider selection of products, but shipping to the USA is costly and takes forever. On the other hand, the USA HobbyKing warehouse does not have as wide a selection, but shipping to US destinations is both cheaper and more timely. For this build, I ordered everything but the motors from the International warehouse.

After waiting a few more weeks, a package from China came!

And check out all the new toys! From left to right, I see two frames (I gave the extra one to Shane Colton), the ESCs, battery (above), and a shitton of props.

Somewhere in the pile of new toys was the Power Distribution Board that Banks highly recommended I purchase. As you can see, it makes hooking everything together really easy. Kinda looks like a floating nervous/circulatory system quadcopter without a backbone...

Speaking of the backbone, let's put the sexy F330 frame together! The kit came with an instruct- I mean INSTRUCITON MANUAL! It was pretty well-written, though the kit was simple enough to figure out myself.

The flip side of the sheet had the same thing, but written in Chinese and probably with better and more detailed instruct- I mean INSTRUCITONS.

What really bugs me about the kit is there is only enough hardware (screws, etc) to put the thing together, and no extras should you lose any. Metric hardware isn't as easy to come by for me, so this may prove itself to be a pain.

The frame consisted of four identical fiberglass arms placed in an equilateral X formation sandwiched by two carbon fiber plates. Lacking the room to hold the battery and control board (which will presumably occupy the very top) and attach the Power Distribution Board (PDB?), I decided to fasten the PDB to the underside of the vehicle. Sure, live power lines are just exposed for now, but I'll insulate the whole thing before trying to fly it.

The tiny (D'AWW SO CUTE!) SK3 2826 motors each come with the proper mounting hardware (Again, no extras in case the tiny M3 screw wanders before it is secure...). I decided to leave off the top carbon fiber plate for now until I could figure out my microcontroller situation.

The ESCs and extra wire folded up pretty nicely on each arm of the copter. I used small black zipties to keep everything down and prevent general self-destruction from the propellers from chopping things up.
The ESCs are sensorless, relying instead on current sensing to commute the motors. For now, I plugged the 3-phase SK3 2826 motors into the ESCs in a random configuration. I will later need to shuffle the leads in order to ensure that each propeller is spinning in the proper direction, producing downward thrust.

The propellers are not all identical. Each set of propellers comes with two pairs (4 total): one pair of clockwise and one pair of counterclockwise props. They are installed diagonally opposite each other on the quad, which is shown in the frame kit instructions. The SK3 2826 motors come with all the mounting hardware necessary to hold the props down. Yet again, no extra metric hardware included should you lose anything. I'm surprised the prop and motor are rotationally coupled by only by the friction force produced by the preloaded washer. I sure hope it doesn't go flying at my face. Or into my arm, for that matter...

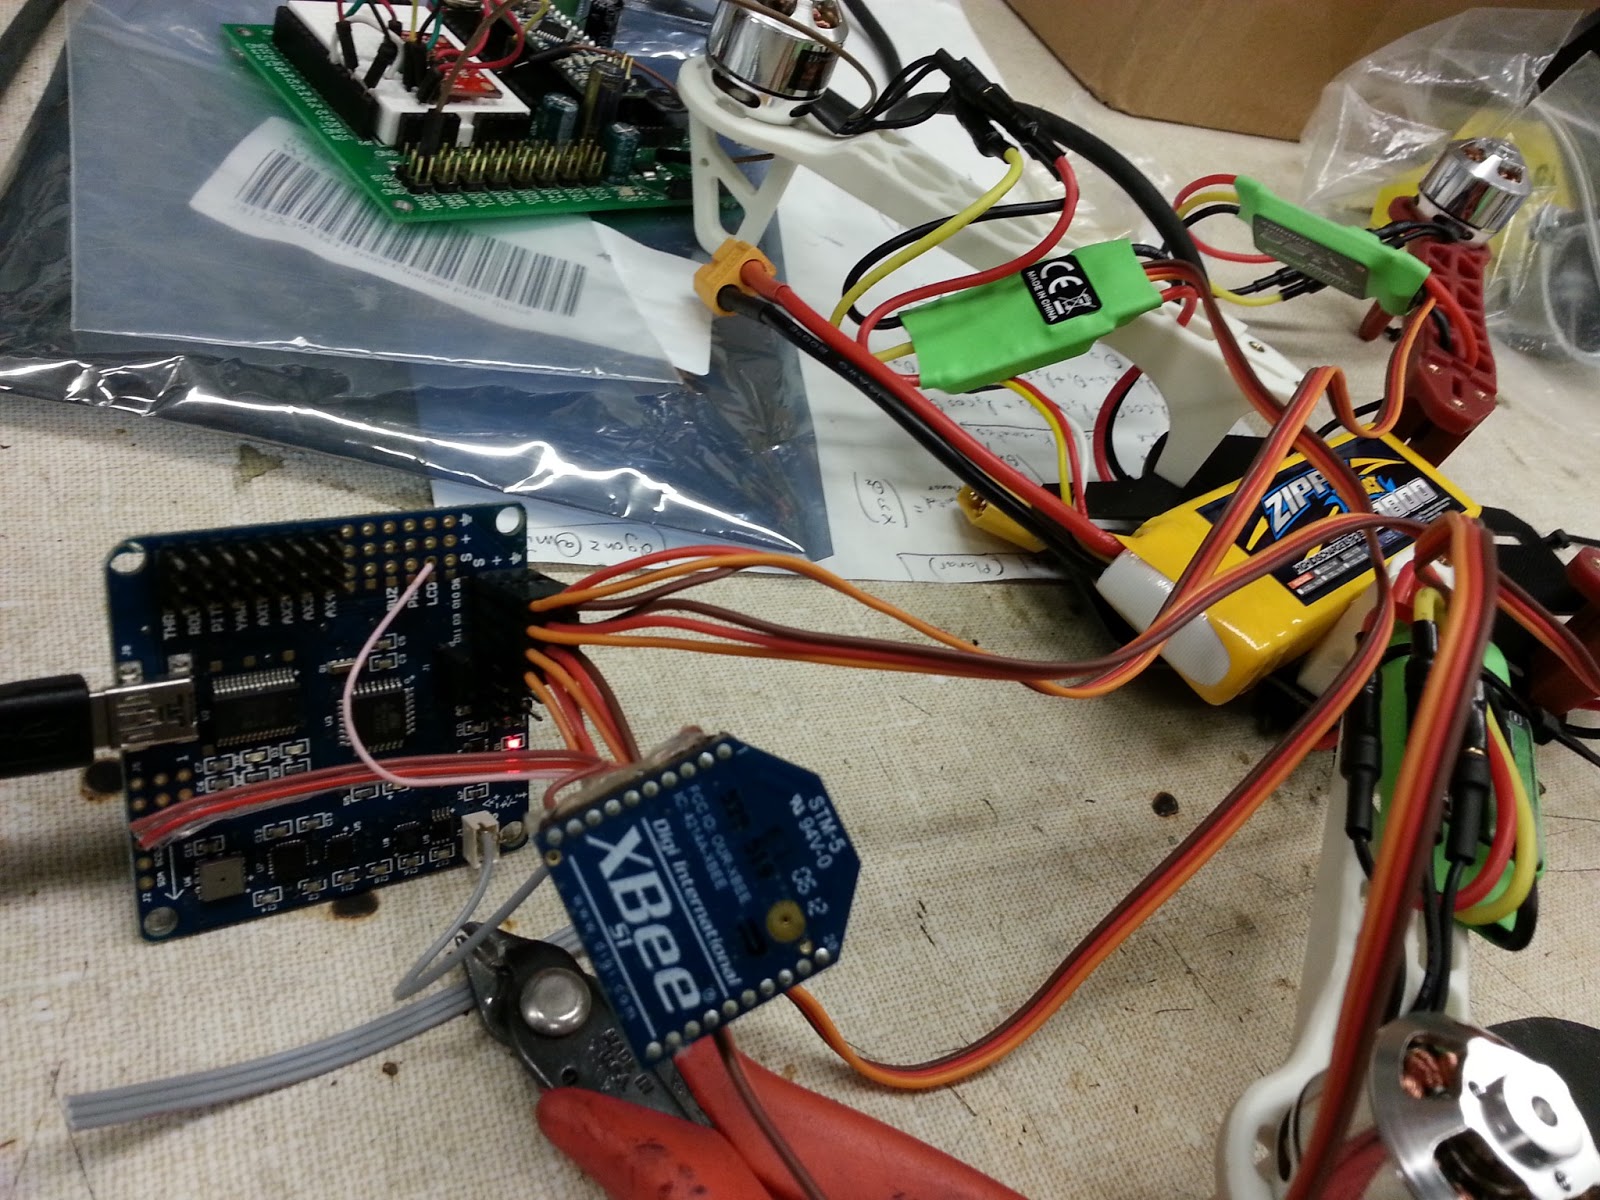
Now, for the controller I was going to use an Arduino of some kind, an XBee attached to it, and a spare Sparkfun MPU6050 breakout board I picked up. Shane gave me something that was pretty much all of the above combined! The MultiWii 328P is a board that houses an atmega328 microcontroller (the same that is found on many an Arduino), an FTDI chip for USB-to-Serial communication and programming, and an array of sensors like an IMU, magnetometer, and barometer for stability and navigation feedback. When Shane used it, he wanted to communicate with a receiver via XBee, so he broke out the necessary UART pins on the MultiWii328P to connect to the XBee. He gave me this great looking all-in-one board in exchange for giving him one of the F330 quad frames (Apparently these are never in stock, and I was lucky to be able to find one).
The ESC leads all plugged into the servo out pins of the MultiWii328P board. It's almost like they designed it to be easy to put together! After fastening the board onto the top carbon fiber plate and attaching the plate to the frame, I had a quadrotor!

where can i get the software
ReplyDeleteFor this build, I wrote the software myself, and I haven't yet released it all (I'm not quite done yet!). Any Arduino-compatible multicopter will do. For example, the MultiWii board software by HobbyKing can be found in the FILES folder here: http://www.hobbyking.com/hobbyking/store/__27033__multiwii_328p_flight_controller_w_ftdi_dsm2_port.html and the ArduCopter software I think can be found here: https://code.google.com/p/arducopter/
ReplyDeleteVery interesting and informative post. It is a team featuring an improved frontrow with Marcos Ayerza havign recovered to be named at loosehead prop selector to see more visit..prop selector Use our outboard boat prop selector to find the perfect outboard propeller for your boat. Easy to use boat propeller guide.
ReplyDeleteGreat work! I was hoping to build one myself but was wondering if you ever finished your code, or if I should just use arducopter? Also, would this be able to carry a 73g GoPro Hero3 plus some mounting hardware? Thanks!
ReplyDeletehey,
ReplyDeleteI am looking to make a quadrotor for my engineering project.I am completely blank.i dunno from wer shld i start my work.
could you please tell me what exactly i should do...????
great work there sir....
ReplyDeletewhat is the maximum height that you have been able to achieve???
reply ASAP!!!!!
Hi all,
ReplyDeleteI have yet to finish this project. I could just download the open MultiWii code and get it working, but I have opted to write my own software from scratch as an exercise. However, pursuing an engineering degree does not give me much free time to play with my toys, so my quadcopter remains ALMOST done. Once I have some time one of these coming weekends I will get it flying, document it, etc. I don't really plan on using this outdoors, as I hear wind is a pain to deal with.
I will release the full code when I'm done with it! That might just be in a few months, so don't count on me haha. I also have no clue off the top of my head the payload of this thing, but I imagine that can be easily calculated based on the top speed of each motor at the system voltage, then the force produced by each motor (proportional to the square of the motor speed). Multiply that max force times four, and see if the gravitational force of the quadcopter + GoPro is less than that. If it's more than about half the max force, the copter may be really sluggish and hard to control, etc.
Best, (SORRY FOR BEING SO BUSY!)
-Daniel
Dear Sir,
ReplyDeleteplease tell me the details that which development board r u using & working with??
I am a newbie, so kindly guide me in all manner so that i could get start.
Thanks & regards
Ranjan
This comment has been removed by a blog administrator.
DeleteThis comment has been removed by a blog administrator.
DeleteIt's good that you show pictures of your project but this doesn't really help much of anything.
ReplyDeleteI am a newb (as are most people coming to see this page) and I bought all my parts but I don't know how to connect them. Where do they connect? What wires go where? Is a breadboard necessary? Alot of questions left unanswered
I bought all the
Ace Hardware usually has a good selection of metric nuts and bolts.
ReplyDeleteHave you uploaded your code for the software? Really wish to see it :)
ReplyDeleteWhat radio did you use?
ReplyDeleteIt seems to be a common and very peculiar point of view among " newbs" that by posting details such as daniel has that he incurs an obligation to provides complete one semester course for free. When I was an engineering student the objective was how to solve problems like a real engineer we hoped to become rather than decrying gaps in details not being packaged perfectly. Model numbers are listed dig in and stop seeking to be spoon fed.
ReplyDeletevery well said :)
Deletecan you help me to do that setup by setup and if you have pdf for that plss give me pls ,;my email is :
ReplyDeletethe_dark_abdo@hotmail.fr
and his my profil in facebook to and thnx
sir,
ReplyDeletefrom which site u have ordered the kit??
Great job sir. Thanks for sharing information about Quadcopter Frame Kit. Keep it up sir.
ReplyDeleteyurtdışı kargo
ReplyDeleteresimli magnet
instagram takipçi satın al
yurtdışı kargo
sms onay
dijital kartvizit
dijital kartvizit
https://nobetci-eczane.org/
8RZ
تسليك مجاري QeiESnV8YD
ReplyDelete