Waterjet Abuse Pt. 2
I finally got a chance to waterjet the parts! Here they are laid out in OMAX.
I finally figured out what one of the issues I've had in past waterjet jobs is! I used placed tabs in my part before automatically generating lead-ins and lead-outs. The toolpath generator would then flip out and confuse parts and holes, cutting along the inside of parts and along the outside of holes. Turns out if I place tabs AFTER generating lead-ins and lead-outs, the toolpath generator is much less likely to flip the shits and screw up my part. Yay, knowledge
And away we go! Quarter inch parts first. Look at all them parts.
And the quarter-inch job is complete! The steering upright design I copied off Chibikart needs one 1/8" plate in order to fit the 5/8" "axle". I realize now how little of Melonchopper is original and how much of it is lifted directly off of Charles Guan's and Shane Colton's respective Chibikart and Tinykart. Or rather, how much of other their designs I was able to utilize and integrate into my idea, which is the point of engineering, right?
You spend time researching something and making something that works well so other people can use your accomplishment to make something even cooler. Than you can step back and say "Cool, (s)he used my design for one thing to make another. I'm flattered." If the wheel ain't broke, don't reinvent it. Because someone already spent sweat and time inventing it already so you didn't have to.
Also, I've been getting better at the whole Tetris thing. Metal is "so espensive", and I want to use every last bit of it I can.
Woo, parts! I love waterjetting because you can spend more time in design and less time fabricating. It's really sad that it's such an expensive and exclusive manufacturing process, but it's nice to be part of the 1% of people with free access ;D TIME TO START PUTTING THINGS TOGETHER!
Compiling my parts into Assembly
I start with the wheel uprights when...
Uh oh, compiler error. These retaining plates aren't fitting together. Time to start filing! Oh the joys of waterjet tolerances...
Oh the joys of waterjet tolerances...
While I dealt with the steering, Bayley put together the main frame.
Filing out the holes and slots was taking too long. Instead, I took the tabs to a belt sander.
MUUUUUCH better. Now I can put the hex bolts (my "wheel axles") into the assembly and have uprights!
OH FOR FU-
The bolts won't fit into the slots -_-. Nothing the belt sander couldn't handle...
YAY WHEEL UPRIGHTS! The bottom plate had smaller bolt holes than the top bunch, so that i could tap 1/4-20 threads and just screw the whole thing together.
Now to mount the uprights. I had to place the upright bearings into these mounts before I fastened them to the 8020.
OH FOR CRYING OUT LOUD. THIS WAS DESIGNED TO BE PUSHED IN WITH YOUR HANDS. Sigh...
Beasting it as usual, nothing to see here.
Cool. Almost ready to mount.
All I need is a washer between the upright and the top plate for the upright mounting to be complete. Issue is, I forgot to purchase 5/8" ID washers, and MITERS didn't seem to have any lying around. They DID have 1/2" ID washers though, whose OD fit perfectly in the space...
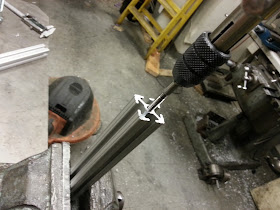
"Bayley, we need to drill this washer out somehow. YES, this is the only 5/8 inch drill bit I could find..."
For ease, I ended up using a 5/8" endmill and these handy clamping doohickeys.

YAY!
STEERING EXISTS! Now to start mounting the steering column.
8020-1010 extrusion has ends that are perfectly sized to tap with 1/4-20. I did just that to mount a steering column support flat up against a plate.
Like so. LOOKING GOOD!

This clamp is not enough to hold the tire rod adapter to the steering column. Good thing I purchased an extra face mount shaft collar for this thing, because I'm going to need to redesign this thing. When I turn the steering column, this just slips.
These is a seat adapter plate. They are very poorly designed, because you cannot access the 8020 fasteners once the seat is mounted onto the adapter plate. Also, the screw that bolts down the seat INTERFERES WITH THE 8020. BECAUSE OF MY BAD/LAZY DESIGN :C. Oh well.
You can see we stacked washers making room for the head of the hex bolt that screws into the bottom of the seat.
I put together the 1/8" plates holding together Melonchopper's butt, as well as threw in the rear wheel mount and motor mount plates.
OMG SO MUCH GOT DONE! It LOOKS SO PRETTY! Let's mount wheels and a seat.
WHEELS AND A SEAT, OH MAN! More build coming up soon as I do it and more parts arrive.


looks good
ReplyDeleteSqueee ^_^
Delete